Showing posts with label paint. Show all posts

Thursday, June 14, 2012

{Fabulous Frames}

This is one of two that I did for a friend.  I am about to add her daughter's names to the frames, but I haven't gotten around to that yet.

This is actually just a white frame--for some reason I edited it and it looked great on my phone, but not so great when you look at it larger. 


Ok, I am In love with these frames I got from  Oh my crafts for only $13!  I painted them with basic acrylic paint then took my sander around the edges.  What a super cheap gift!  {Bonus}  if you spend over $30 you usually get 20% off your order which makes them really a good deal especially if you are doing them to sell like me.  
These are really heavy, thick wood.  Holds a 4x6 picture. 


The water bottle is there so you can see the sizing of the frame.


Saturday, June 9, 2012

{Chalkboard Station}


This all started with me picking up a random chalkboard at Hobby Lobby.  Ten minutes after I got home I had the thing painted and within an hour I had it sanded.  Then I walked around wondering what to do with it.  Then I had an idea--which then lead me back to Hobby Lobby for another board (and they didn't have another large one so I got a smaller one, which ended up working out much better!)
I'm into a "flying" phase--


Madly in {love} with this. 

I found a unpainted frame in my craft drawer, painted it, distressed it, then took the back off and hot glued metal sheets to the back!   Instant message board!

Maybe, maybe one day I will let the kids draw on it, but for now I just want to look at it and smile!
So after one day I finally let my little man take a test drive on the board after I scored it really well with the chalk.  Turns out this board is the perfect height and size to draw and create on!

Tuesday, February 14, 2012

{Lots of Canvases}

I decided to compile the canvases that I have done into one post in case anyone is looking for ideas and doesn't want to click around a ton of times to see different ones.
Made this one for a precious little girl!
Made this for my daughter's kitchen.  I cut out vinyl polka dots and put them on the white canvas then spray painted it blue.  Peeled off the vinyl after it dried and {hello} I had perfect dots!  Then I cut what I wanted to say--Mod Podged it on there and topped it off with a layer of spray sealant.  Fab!
Smaller canvas I sat above my sink during Thanksgiving. 
This took some time {but the Bride-to-be loved it so it was worth it}  I hand painted the canvas black then created stencils for all the words and then laid them out on the canvas how I wanted them to be placed.  Remember to tape them down because they will move on you though.  Took some white paint and filled the stencils in.  Not a quick project, but what a gift!
Baby boy
Another baby boy canvas for a nursery
Yet another boy canvas for a nursery!

{burlap banner}


 I {LOVE} burlap.  These are some pics of some banners I made for a photographer to use.  For the tutorial on how I made them check out my creating a burlap banner post.


Monday, January 30, 2012

{Baby Boy Canvas}

I just finished this canvas for a super sweet little man about to be born!  Little Lincoln won't arrive for a few more weeks but I am so excited to give the parents this canvas to match their pirate bedding from Babies R us called Pirate Party.  I matched the colors and hopefully this will hang in their nursery!
I started by taping off lines with painters tape on my 18x24 canvas.  I didn't even measure here.  I kinda wanted the "unperfect" look that different sized lines would create.  Crazy enough though the lines weren't that far off in sizing so my goal wasn't truly achieved.
Pull off that tap after 3 coats of each color (that red was horrible by the way because it streaks on a canvas)
I did the edges so that when you see it from the side it looks nice
These are the colors that I used.  Notice that I have a combo of brands.  It was whatever I had on hand!
My final project!  I have to admit that this canvas took FOREVER to paint.  Not because it was hard, but because I didn't "think" about painting over stripes.  I attempted to first paint the name in brown.  Well, that didn't show up so then I went with black.  Well, you couldn't read the freakin font then.  My husband said that he didn't like the font anyways (I disagree although it is hard to read but love his heart he was trying to help).  So then I ran to the craft store and bought a paint pen and went around the letters like 5 times to get the white to show up.  
**So my final comment on this canvas is that it might look cute, but if you paint stripes go ahead and do vinyl over top, not paint.  Otherwise you will be in the same place I was--it won't show up over the colors.  Or better yet, don't put a dark color like navy right in the middle of the canvas.  Put it at the bottom so black or brown paint will show up!**

Tuesday, January 24, 2012

{Party of 4]

I got this idea from Brown Paper Packages and fell in love.  I changed a few small things, but basically it is the same idea!
Materials Needed:
4x4 wooden squares (I went to Home Depot and got a post cut into squares and yes, the guy did look at me like I was crazy)
Paint (I used acrylic) or Spray Paint
Foam brush (if you use paint and not spray paint)
Vinyl (I used black)
A Sander (I use my little mouse)
Optional ribbon

I first put on 2 coats of white paint.  I do this so when I sand the color underneath is white and not wood although the wood looks pretty darn good too.


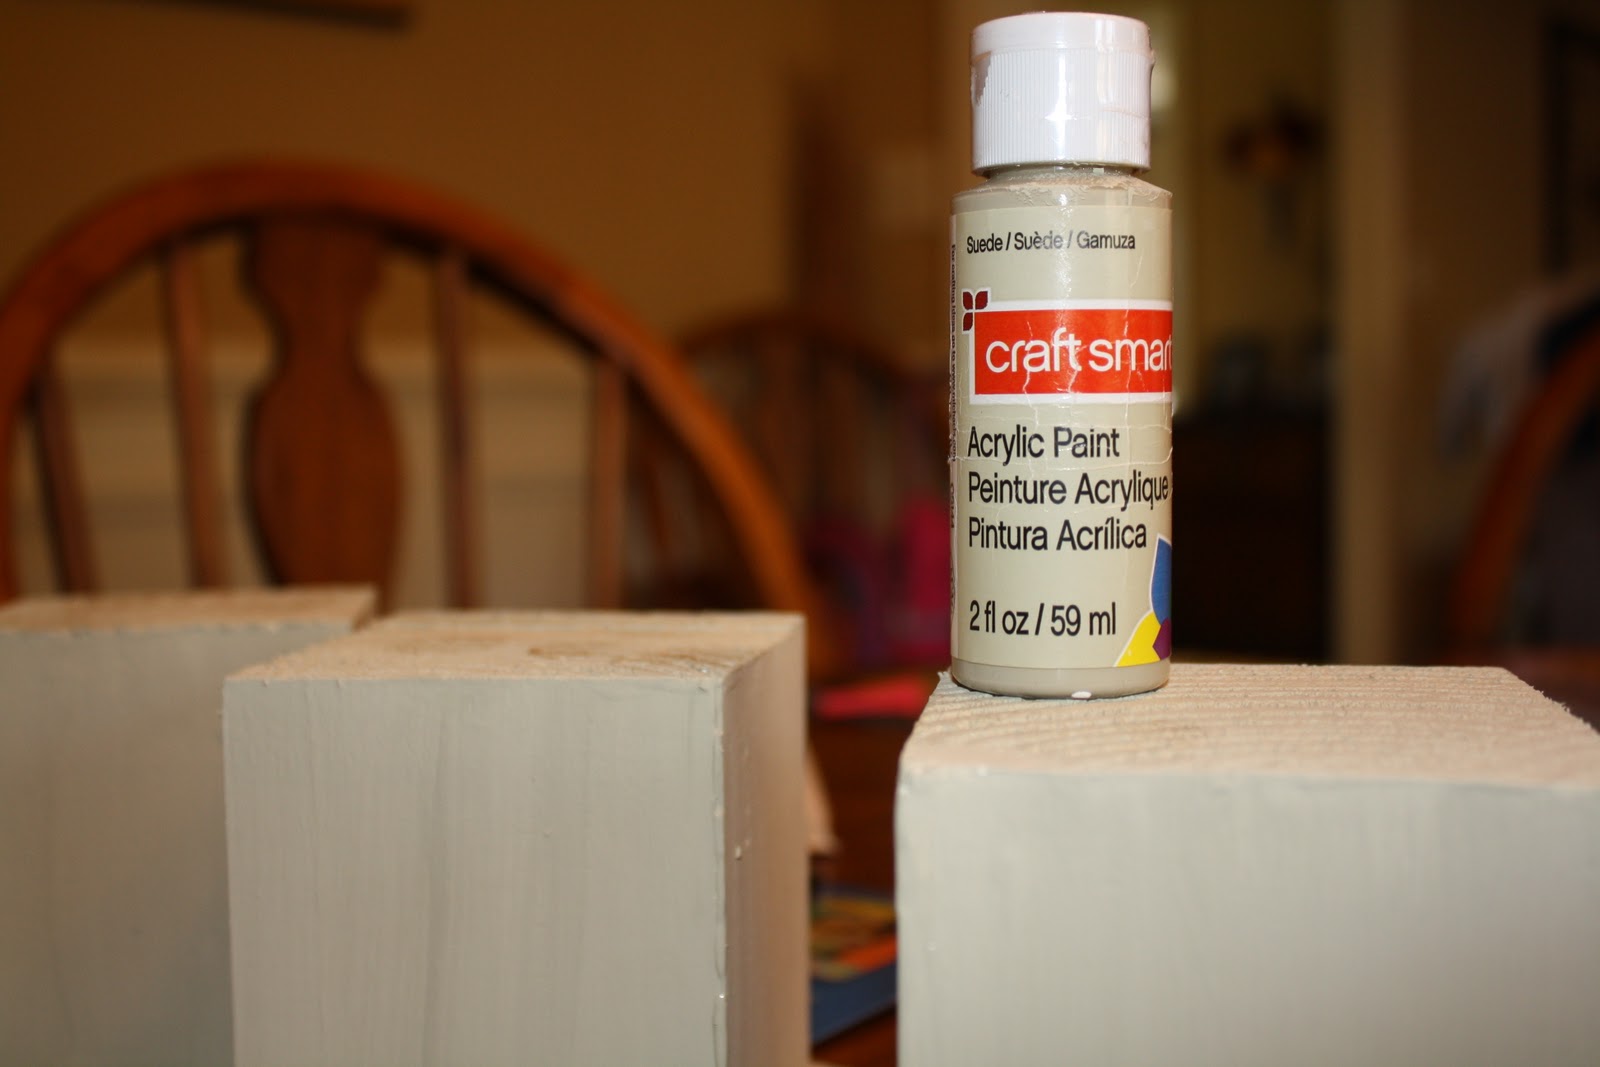
Next came 2 coats of whatever color you are doing.  I did a suede color (basically tan) but next time I am going to do black to mix it up a little
After that dries go to town and back with your sander.  I literally just sand around the edges and hit up the surfaces.  Total time of sanding equals less than 3 minutes probably.  Remember after sanding to wipe all the powder off or your vinyl won't stick plus you will just have a hot mess of shavings in your house!


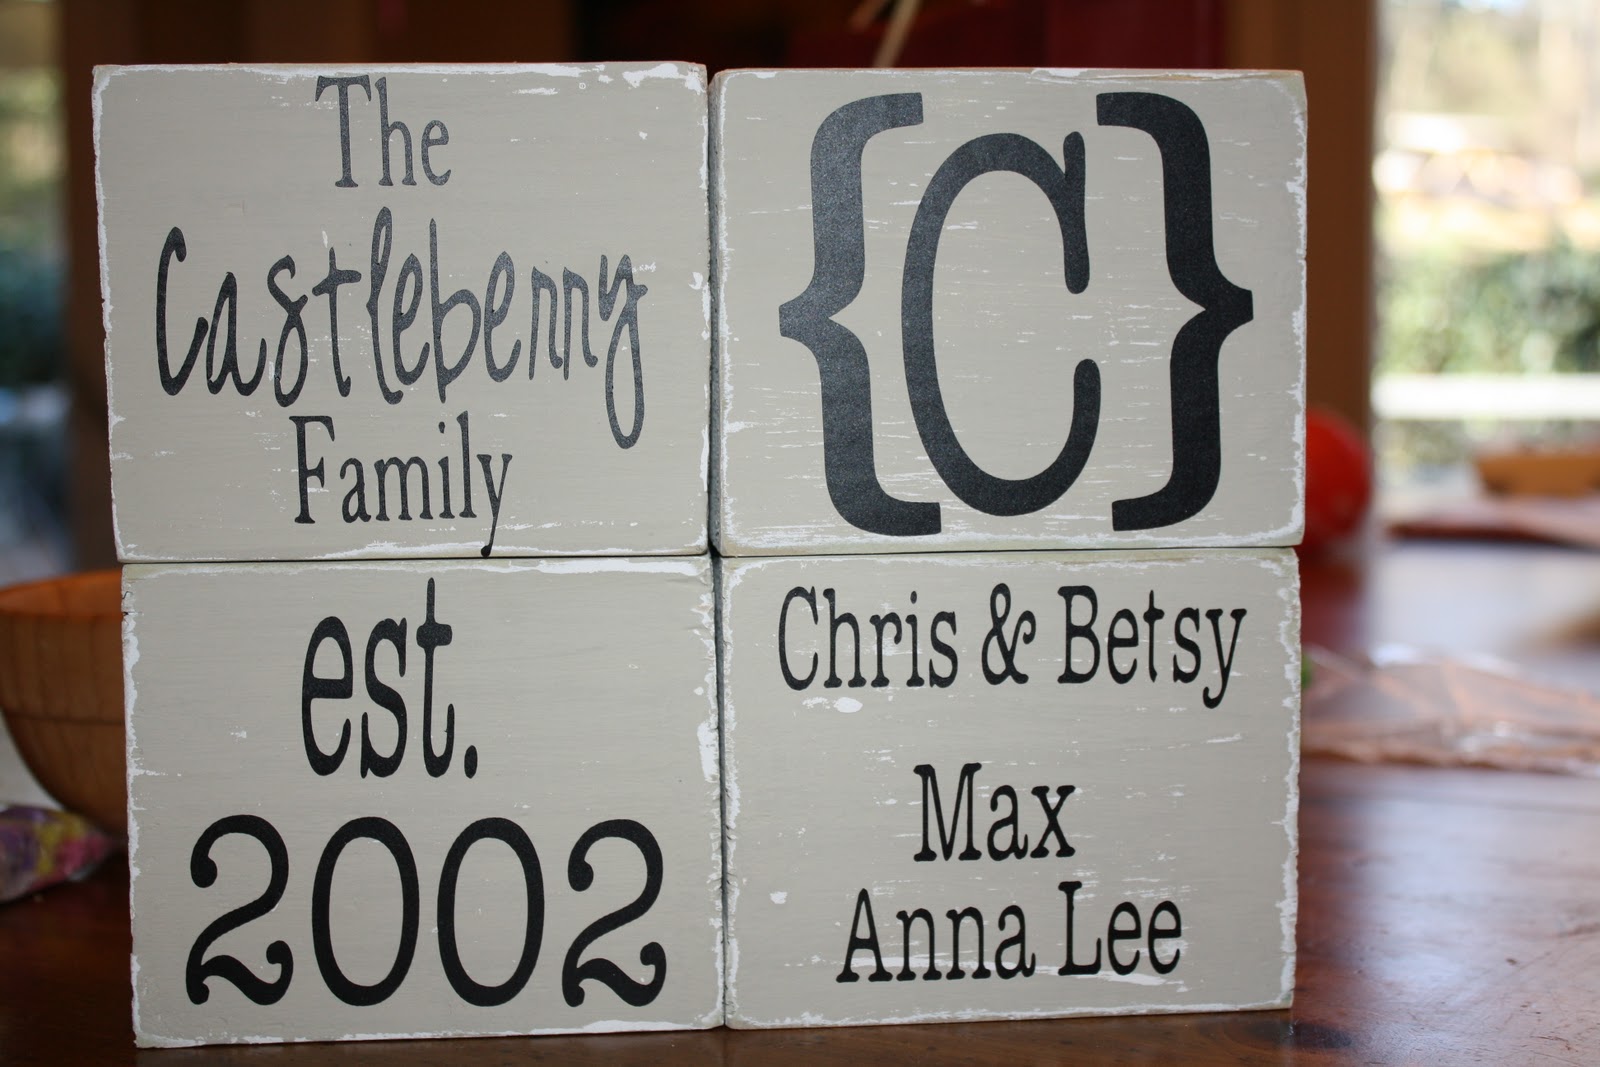
Apply your vinyl~no need to put anything on top to seal it, but you could if you wanted.  I like the rough look of the wood and didn't want it shiny.  You could matte mod podge if you wanted though.
One other idea I thought about was putting on one block "Party of 4".  That might be on my next set I make!
Last tie a ribbon around the blocks so you can give them and they stay together. 

I'm taking this Saturday to a party for the hostess and I am 99% sure she will {love} them!

Monday, January 9, 2012

{Creating a Burlap Banner}

Super cute and soooo super easy!  Here is an example of my Easter Banner I made.  
Supplies:
Burlap
Stencil (I used a 4 inch stencil, but go with the size you want your overall banner to be)
paint (any color)
scissors
twine/jute
pins
ribbon of your choice
First start with making a template of how big to cut your burlap.  I swear this was the most time consuming thing of the entire project! I have seen banners made with squares instead of flags and that would probably be easier than the flags--go with the style you want.  I traced a letter onto a lid of a shoe box and then drew a triangle around it using a ruler.  Super easy.

With a foam brush I simply used white craft paint and filled in the stencil